
iMovie is a famous video editing software that comes pre-installed on all Macs. It carries a wide range of editing functions, including the ability to add voiceovers to your videos. If you are new to iMovie or if you have never added a voiceover to a video before, you can follow this guide to do a voiceover on iMovie step-by-step.

A voiceover is a recording of a person's voice that is added to a video. It can be used to provide information, narrate the action, or simply add a personal touch. iMovie makes it easy to add voiceovers to your videos, whether you are using a Mac or an iPhone.
Before you start recording your voiceover, it's important to do some preparation. That will help you create a high-quality voiceover recording on iMovie that is clear and easy to understand.
First, you should find a quiet place where you won't be interrupted by noise. The built-in microphone on your Mac will help to record a voiceover on iMovie. If you have a professional microphone, use it. Moreover, you’d better write a script to ensure your voiceover is clear and concise.
Step 1. Once you are prepared, it's time to start recording your voiceover on iMovie. Launch iMovie on your Mac and create a new project. Click Import Video to add your video file to iMovie. Put the video onto the timeline for later editing.
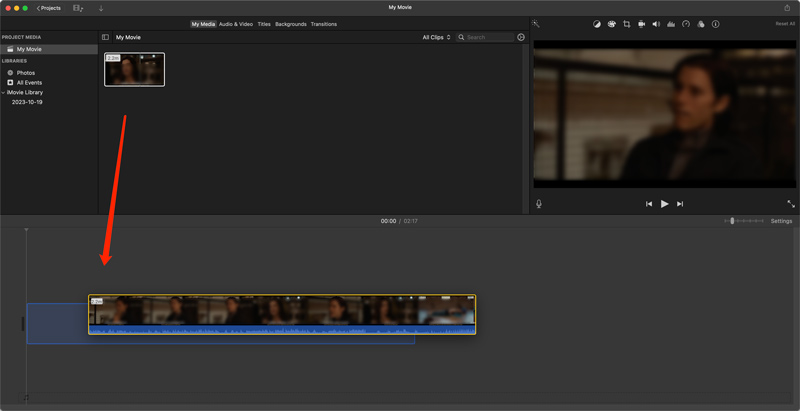
Step 2. Click the playhead (the white vertical line) in the timeline and drag it to the point where you want your voiceover to begin. Click the Record Voiceover button, which is located below the viewer window.
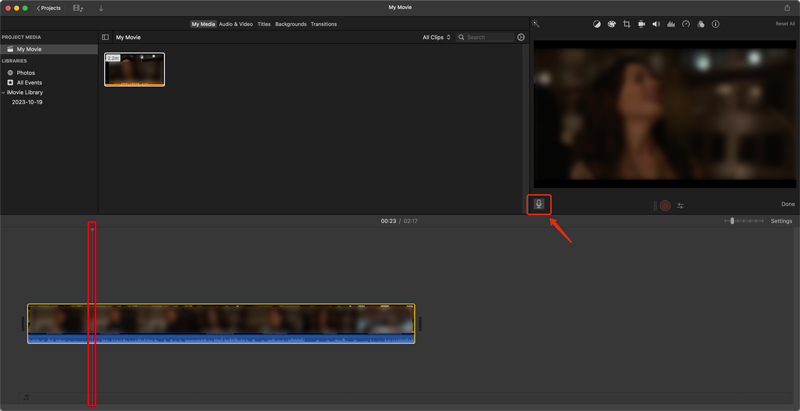
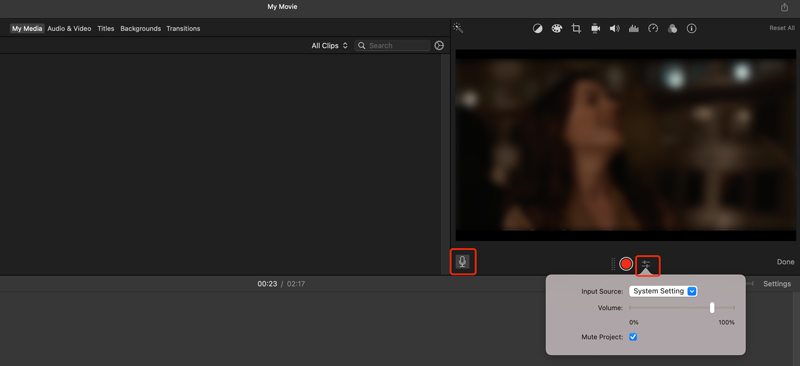
Step 3. Click the Voiceover Options icon to select the voice recording source, adjust the volume, and choose to enable/disable Mute Project according to your needs.
When you are ready, start speaking your voiceover. During the recording, you can pause and resume as long as you need. Click the Stop Recording button when you finish the voiceover.
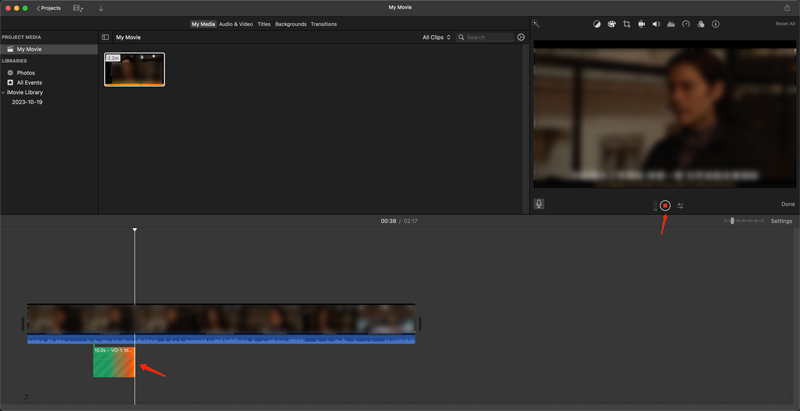
Step 4. After recording a voiceover, you may want to edit it to remove any mistakes or improve the sound quality. Click the timeline and select the voiceover clip. You can then use the editing tools to trim the clip, adjust the volume, or add effects.
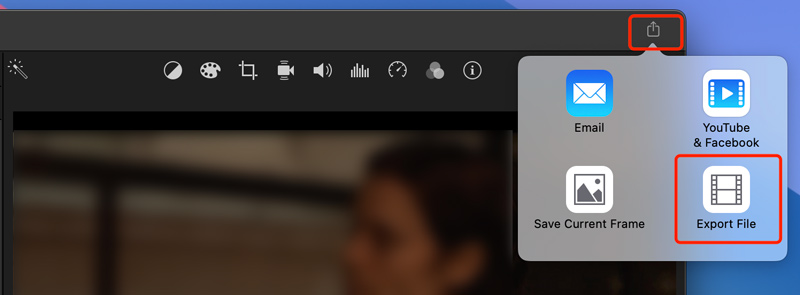
Step 5. Once you are happy with the recorded voiceover, you can add it to your video. You can see the recorded voiceover clip under the video timeline. Click the Share button in the upper-right corner and choose Export File to add the recorded voiceover to your video.
Step 1. Open the iMovie app and create a project to load your video. If you don’t have iMovie on your iOS device, install it from the App Store. Tap the video to put it onto the timeline for editing. Some commonly used editing options will appear on the bottom part. Tap Voiceover to record a voiceover on iMovie.
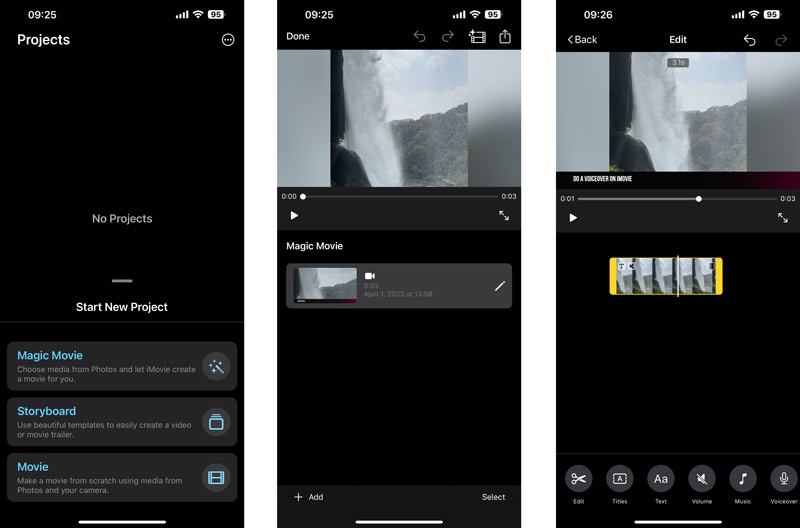
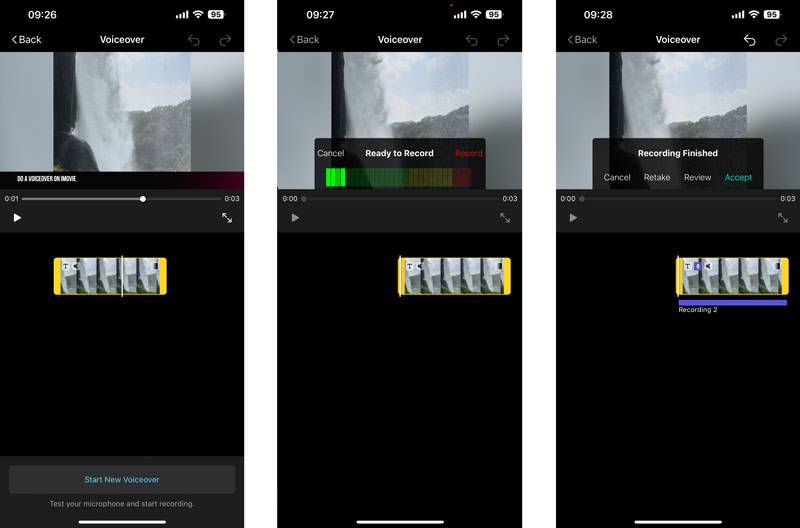
Step 2. Tap the Start New Voiceover button to begin capturing your voice. Ensure you place the playhead in the right position where you like to start your voiceover.
Step 3. Tap the Record button above the viewer. As you are recording, speak slowly and clearly. Be sure to pause between sentences and paragraphs. When you are finished with the voiceover recording on iMovie, view it and tap the Accept button.
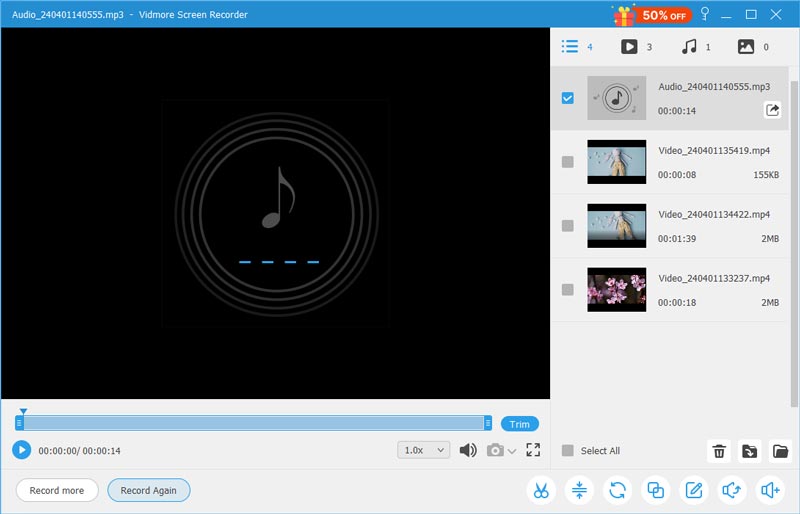
To record a voiceover and add the recorded audio to your video in iMovie, you can also use the easy-to-use Vidmore Screen Recorder. It can capture sound from your microphone and the system audio card with high quality.

Step 1. Download and install Vidmore Screen Recorder. Launch it and select the Audio Recorder mode.
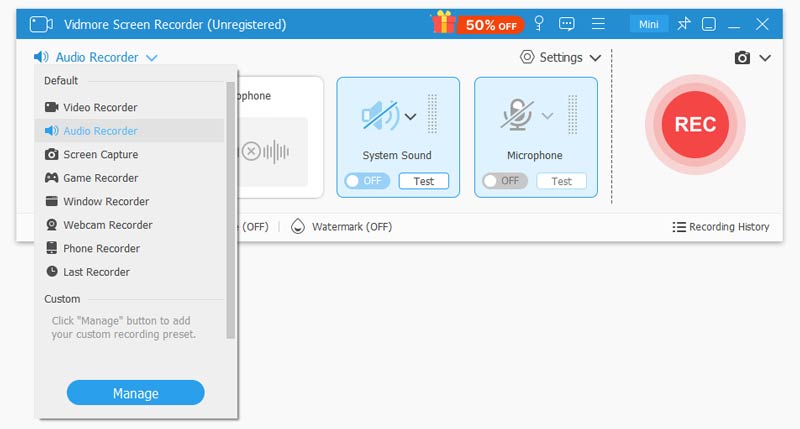
Step 2. Select the audio type you want to record. You can disable the System Sound and enable the Microphone .

Step 3. Click the Record button to start your voiceover recording. You can save the recorded voiceover in any audio format you need. It lets you edit your voiceover and remove unwanted clips.
Question 1. How to edit a voiceover in iMovie?
To edit a voiceover in iMovie, you can add the voiceover clip to iMovie and put it onto the timeline. Some basic editing features are displayed above the viewer window for you to freely edit your voiceover.
Question 2. Why iMovie can't record voiceover?
There are a few common reasons why iMovie might not be able to record a voiceover. If your microphone is not selected, iMovie can’t capture your voice. When your microphone is muted, or it is not working properly, iMovie may not record a voiceover normally. Sometimes, it may be a problem with the iMovie itself. Try restarting iMovie or reinstalling it.
Question 3. How do you do when the iMovie voiceover has no sound?
If your iMovie voiceover has no sound, you should first check your microphone settings. Ensure your microphone is selected in the Voiceover menu and that it is not muted. If the problem is still existing, try restarting iMovie or resetting iMovie preferences. Also, you should check for updates to iMovie. Make sure that you are using the latest version of iMovie. If you are still having trouble, try using a different microphone to see if that works. If you have tried all of the above and your iMovie voiceover still has no sound, then it may be a problem with the app itself. You can try contacting Apple Support for help.
iMovie makes it easy to record and add voiceovers to your videos. It has a built-in voiceover recorder to capture your voice and add the recorded audio clip to your video. This guide walks you through the steps of how to do a voiceover on iMovie. You can follow it to record a voiceover on iMovie with ease.
 Leading iMovie on Windows You Can Try [2024]
 Easy Guide: How to Add Text in iMovie for Engaging Videos
 How to Add Music in iMovie: Enhance Your Videos with Soundtracks
![]()
Try Vidmore Video Converter for Free
All-in-one toolkit for converting and editing video & audio files in Windows 11/10/8/7, Mac OS X 10.12 and higher
based on 176 user reviews